


Minox 8x11 Submin Guide: Cutting Film, Loading Cartridges, Developing Yourself, and Scanning
Community tip: moments-of-now.com
Thomas Siepmann has documented his experiences with Minox cameras for years — detailed guides, film tests, and practical tips. An absolute must-read for Minox beginners.
The Minox 8x11 format is one of the most fascinating chapters in photography history: a spy camera that fits in your palm and delivers surprising images. But getting started with subminiature photography can be confusing — which camera? Which film? How to develop? How to digitize?
Here you’ll find everything you need — from camera choice to finished scan. Concrete recommendations, practical tips, pitfalls.
Table of contents
- Camera choice — Which Minox for beginners?
- Film selection — buy ready-made or load yourself?
- Cassettes & tools — loading film yourself
- What to watch out for when shooting?
- Developing — lab or at home?
- Digitizing — methods compared
- Digitizing with the Ausgeknipst setup
The complete workflow in video
Before going into detail: In this 10-minute demo, Antonio walks through the entire workflow — cutting film (1:46), loading cassette (3:21), developing (6:07), and scanning (8:15). Everything this guide explains step by step, shown all at once.
1. Camera choice — Which Minox for beginners?

Photo: Central Intelligence Agency (CIA) — Public Domain via Wikimedia Commons
Minox cameras are tiny, precise, and surprisingly powerful — but which model is right for you? The relevant models at a glance — with concrete buying recommendations.
The Minox family at a glance
All 8x11 Minox cameras share the same basic principle: a sliding metal body, a fixed 15mm lens, estimated focus, and a film advance that works automatically when opening and closing the camera.
| Model | Year of manufacture | Lens | Shutter | Light meter | Battery | Used price |
|---|---|---|---|---|---|---|
| Minox A / IIIs | 1948–1969 | 15mm f/3.5 Complan | 1/2–1/1000s + B | None | None | €140–280 |
| Minox B | 1958–1972 | 15mm f/3.5 Complan | 1/2–1/1000s + B | Selenium (external) | None | €180–370 |
| Minox BL | 1968–1972 | 15mm f/3.5 Complan | 1/2–1/1000s + B | CdS | PX27 (5.6V) | €230–420 |
| Minox C | 1969–1978 | 15mm f/2.8 Color-Minotar | 1/4–1/500s | CdS + Auto | PX27 (5.6V) | €280–460 |
| Minox EC | 1974–1978 | 15mm f/3.5 Color-Minotar | 1/30–1/500s (auto only) | CdS | PX27 (5.6V) | €230–370 |
| Minox LX | 1978–1990s | 15mm f/3.5 MCA Rokkor | 1/2000–34s + B/T | CdS (TTL) | PX27 or adapter | €370–650 |
| Minox TLX | 1988–1990s | 15mm f/3.5 | Auto + Manual | CdS | Button cell | €320–550 |
| Minox CLX | 1980s–1990s | 15mm f/3.5 | Auto | CdS | Button cell | €280–460 |
Our recommendation: Minox B or Minox A
For beginners, we recommend the Minox B — for one simple reason: it doesn’t need a battery. The selenium light meter works purely mechanically and still provides usable readings after 60+ years (as long as the selenium cell is still intact). Plus: The B is by far the most common model on the used market, with spare parts and CLA services (Clean-Lube-Adjust) available.
The Minox A (or IIIs) is the alternative for purists: Completely mechanical, no light meter, no battery, nothing that can break. Exposure is estimated using the Sunny-16 rule or measured with a smartphone app.
Budget tip: Minox EC — The cheapest option, fully automatic and foolproof. Downside: No manual control and battery-dependent (PX27 required).
What to watch for when buying used
- Test sliding mechanism — The camera must open/close cleanly, without resistance or scratching
- Check focus wheel — Must turn smoothly, from 20cm to infinity
- Listen to the shutter — Click through all speeds, listen for even sound
- Light meter (for B/BL/C) — Test under different lighting conditions, compare with smartphone app
- Film transport — Opening/closing should advance the film counter
- CLA service — A serviced camera is worth its weight in gold. Budget: ~€80–120 at a specialist
Where to buy: eBay (classifieds + international), Photrio.com forum, Minox clubs, local flea markets.
Non-Minox cameras for 8x11
- Yashica Atoron (1970s, also sold in Germany via Quelle mail order as Revue mini-star) — 15mm f/2.8, CdS meter, auto exposure. Cheaper than Minox (€90–180), solid entry into the 8x11 world, but not as finely made as the original Minox cameras.
- VEF Riga — The historic original father of Minox (Latvian production before World War II). Collector’s item with distance setting (from 20cm) and no light meter. Due to high collector value, we recommend not actively shooting with the VEF Riga. Note: Our 3D-printed film cassettes do not fit the VEF Riga — cassette dimensions differ slightly.
2. Film selection — Buy ready-made or load yourself?

Photo: Wikimedia Commons — Minox Film Slitter
Original Minox film is no longer produced — but that’s not a problem. Today you have two ways to get film: buy ready-made or load it yourself. And the DIY route is not only cheaper but also gives you the freedom to choose from the entire 35mm film range.
Option 1: Buy ready-made Minox film
There are still some sources for pre-loaded 8x11 film:
- Blue Moon Camera (USA) — Specialist in subminiature film, ~$26/roll
- Fotoimpex (Germany) — Occasionally has Minox film in stock
- NOS (New Old Stock) — Original Minopan, Minocolor or Minox SPY film on eBay. Caution: Expiration dates often exceeded by 20+ years
For beginners, ready-made film is ideal — you get to know the camera without having to worry about the loading process at the same time. But in the long run, it gets expensive.
Option 2: Load film yourself — The practical alternative
The math is simple: The basic cutter splits a 35mm film cartridge (€5–15) lengthwise into two 9.2mm strips over the full film length. This creates four complete 36-exposure Minox films plus two shorter films with 15-18 exposures. Cost: ~€1-3 per Minox film instead of €26 for original goods.
You need:
- A film cutter — e.g., our Ausgeknipst Film Cutter or the Camerhack Slitter
- A refillable cassette — e.g., our Ausgeknipst Film Cassette
Details on the cutting and loading process can be found in Chapter 3.
Which film works in the 8x11 format?
Basically, any 35mm or 120 film works — it just needs to be cut to 9.2mm width. Here are our recommendations by use case:
Black and white
| Film | ISO | Strength | Ideal for |
|---|---|---|---|
| Ilford FP4+ | 125 | Fine grain, high resolution | Landscape, architecture |
| Ilford HP5+ | 400 | Versatile, good pushability | Street, travel, all-rounder |
| Kodak Tri-X 400 | 400 | Legendary grain, high contrast | Street, documentary |
| ADOX CMS 20 II | 20 | Extreme resolution (400 lp/mm) | Maximum sharpness |
| Fomapan 100 | 100 | Budget option, good grain | Entry-level, experimenting |
Color (C-41)
| Film | ISO | Strength | Ideal for |
|---|---|---|---|
| Kodak Ektar 100 | 100 | Fine-grained, high resolution | Landscape, best color quality |
| Kodak Gold 200 | 200 | Warm, affordable | Everyday, travel |
| Kodak Portra 400 | 400 | Natural skin tones | Portraits, people |
| CineStill 50D | 50 | Cinematic color profile | Daylight, characterful images |
ISO choice: What the small format dictates
In the 8x11 format, the resolution of the negative is the limiting factor — not the camera. The tiny negative (8×11mm = 88 mm²) must be greatly enlarged, and every film grain structure becomes a problem.
Rule of thumb: ISO 50–100 delivers the best results. ISO 400 is the practical compromise. Above that, grain becomes dominant and eats up details.
Megapixel equivalent
| Film | Resolution (lp/mm) | Theoretical MP equivalent |
|---|---|---|
| Kodak Gold 200 | 50 | ~1.5 MP |
| Kodak Ektar 100 | 100 | ~5 MP |
| Ilford FP4+ | 120 | ~7 MP |
| ADOX CMS 20 II | 400 (lens-limited) | ~15–20 MP |
In practice: 3–8 MP effective resolution — depending on film, focus, and shake. Enough for social media, websites, and smaller prints (up to about A5).
Attention: Warning: Highly sensitive films and light leaks
Films with ISO 800 and higher (especially Ilford Delta 3200) are extremely light-sensitive — and the small cassette format offers less light protection than a 35mm cartridge. Our recommendation: stay at ISO 400 and push in development.
3. Cassettes & tools — load film yourself

Scene from our workflow video — video at 4:52 · Product: Film cassette for Minox 8x11
Loading film yourself sounds more complicated than it is. With the right tools, the process takes less than 10 minutes — and you save about 85% compared to ready-made Minox film.
What you need
- A film cutter — to cut 35mm film to 9.2mm width
- A refillable cassette — that holds the film and fits into the camera
- Tape — to attach the film start to the take-up spool
- A storage case — for the loaded cassette
The film cutter
Ausgeknipst Film Cutter (SKU 1591p)
- Cuts 35mm, 120, or 16mm film to exactly 9.2mm Minox width
- Modular design: interchangeable inserts for different output formats
- Daylight operation — film is protected inside the cutter
- Safety lid prevents accidental opening
Camerhack Daylight Slitter (~$35) — Simpler design, works well. Splits the 35mm roll lengthwise into two 9.2mm strips, enough for four 36-exposure Minox films plus two shorter films.
The film cassette
Ausgeknipst Film Cassette (Refill) 8x11 (SKU 1522b)
- 3D-printed replica cassette for 36 exposures
- 4-part construction: Feeding Chamber, Film Chamber, Take-Up Spool, Lid
- Compatible with: Minox A, B, BL, C, EC, LX, TLX, CLX, MX, Sharan, Yashica Atoron
- LX cameras: Automatic counter reset when loading
Attention: Important: USE ONLY 36-exposure cassettes! The 15-exposure cassettes have a different spool diameter and do not fit all camera models.
Load film — step by step
Preparation (in daylight):
- Cut film — Insert 35mm film into the cutter and cut to 9.2mm
- Prepare tape — Cut a piece (9mm high × approx. 45mm long)
- Prepare cassette — Only open the Feeding Chamber
Loading (in COMPLETE darkness!):
- Secure film start — Fix the film strip to the take-up spool with tape
- Spool the film — Wind carefully and evenly, emulsion facing inward
- Close the cassette — Attach and snap the feeding chamber in place
- Immediately into the canister — Put the loaded cassette directly into the storage canister
Tips from practice (Source: moments-of-now.com):
- A changing bag (dark bag) is cheaper than a full darkroom
- Practice the first time with an old film — in light, to understand the mechanism
- The take-up spool should turn freely — if it sticks, rewind the film
Video tutorial: Loading film step by step
Andrew Long shows the complete loading process in his detailed tutorial — from preparation to finished cassette:
Practical test: Community feedback
Independent test by Thomas Siepmann (moments-of-now.com)
Thomas tested our cassette in a Minox A with ISO 200 film and had it developed in a professional lab:
- Light tightness: Sufficiently light-tight with proper handling. Even with intentional exposure to extreme midday sun (EV 15), only minimal light leak appears at the film end — no problem with normal cassette changes in the shade.
- Film transport: Even spacing between negatives, no increased resistance.
- Scratches: No scratches visible on the developed film.

Test strip from a Minox A — correct frame spacing, no scratches. Slight light leak at the film end only with intentional extreme exposure (EV 15). Photo: Thomas Siepmann / moments-of-now.com
4. What to watch out for when shooting?

Photo: Wikimedia Commons — Minox EC & LX
8x11 photography has its own rules. The negative is tiny — every mistake in exposure, focus, or camera shake is mercilessly magnified. A few things that make a difference.
Setting exposure correctly
Cameras with a light meter (B, BL, C, EC, LX): The built-in meters are surprisingly reliable on most models. If you’re unsure: compare with a smartphone app (e.g., LightMeter or PhotoMate).
Cameras without a light meter (Minox A): The Sunny-16 rule is your best friend — Sun: f/16, 1/ISO value. Cloudy: f/8. Shade: f/5.6.
Focusing — Mastering Estimated Focus
All Minox cameras use estimated focus. The trick: use hyperfocal distance. At f/3.5 and 15mm focal length, the depth of field is surprisingly large. Set focus to ~2 meters — everything from ~1m to infinity will be sharp. For street photography, just set to 2 meters and forget it.
Shake — the biggest problem in 8x11
Camera shake is much more critical in 8x11 format than in 35mm because the negative must be enlarged more.
- At least 1/125s for sharp handheld shots
- Hold the camera steady — support your arms or lean against a wall
- Press the shutter gently — don’t jerk
Composition for 8x11
- Simple subjects work best — a clear subject, little distraction
- High contrast helps — high-contrast scenes look better than flat ones
- Get close — Minox pictures benefit from proximity, not wide-angle panoramas
Practical checklist
- Bring a spare cassette (loaded + in the canister)
- Change cassette only in dim light
- Check the camera before shooting: Has the film counter advanced?
- In cold conditions: warm up the camera slowly (condensation possible)
5. Developing — lab or at home?
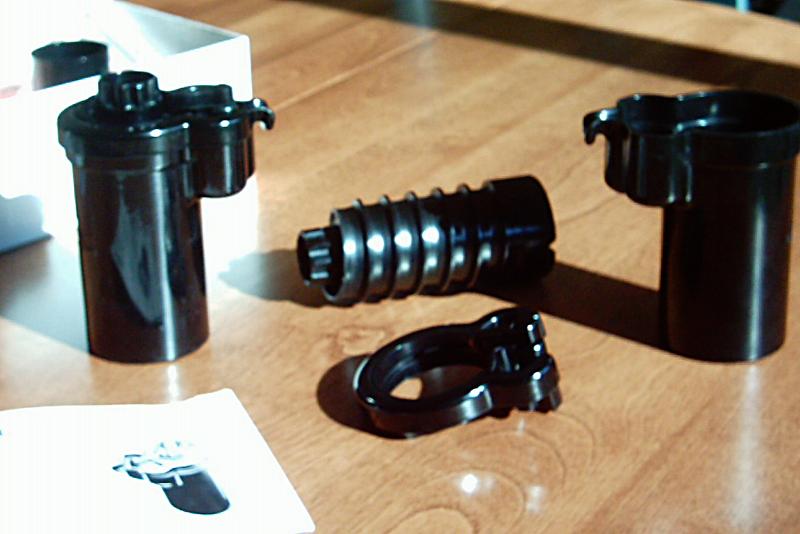
Photo: Wikimedia Commons — Minox daylight development tank
Your Minox film is exposed — now it needs to be developed. This is the step where many beginners get uncertain because 8x11 doesn’t fit into the standard workflow of most photo labs. There are three ways.
Option 1: Have it developed at a photo lab
The biggest problem: Most labs cannot process 8x11. But there is a clever trick:
The C-41 trick: transferring Minox film into a 35mm cartridge
In the dark, remove the Minox film from the cassette and spool it into an empty 35mm film cartridge. Take it to a regular lab — the machine develops the film normally. Mark clearly: "Do not cut film!" Cost: ~€5 per film, about 1 hour turnaround. Works only for C-41 (color negative).
Special labs for 8x11:
- Fotoimpex (Germany) — Specialist in analog photography
- Blue Moon Camera (Portland, USA) — Specialist in subminiature
- ag photographic (UK) — Subminiature development and scanning
Option 2: Develop at home

Scene from our workflow video — in the video from 6:40 · Product: Development spiral 8x11 (Paterson & Jobo)
Developing yourself gives you full control over the process — and is much cheaper than the lab in the long run. The standard spools from Jobo and Paterson are made for 35mm — 8x11 does not fit. That’s why we developed dedicated spools:
| Product | SKU | Tank compatibility | Price |
|---|---|---|---|
| Ausgeknipst 8x11 spool for Jobo | 1505p | All Jobo 1500 and 2500 series | €24,95 |
| Ausgeknipst 8x11 spool for Paterson | 1502b | All Paterson Super System 4 | €29,95 |
B&W development: the process
- Spooling film (in the dark/change bag) — place film strip into the 8x11 spool
- Developer — e.g. Rodinal 1+50, 10–12 min at 20°C
- Stop bath — 30 seconds
- Fixer — 5 minutes
- Rinsing — 10–15 minutes running water
- Wetting agent — drops of Agepon or dish soap against water spots
- Drying — hang film, dust-free environment
C-41 color development at home
With a C-41 kit (e.g. CineStill Cs41, Tetenal Colortec) color development is also possible. Temperature critical: 38°C ± 0.5°C. One kit is enough for ~16–24 films.
6. Digitizing — methods compared

Photo: Wikimedia Commons — Original Minox copy stand
You developed the film — now you have to turn the tiny negatives into digital images. Not every method that works for 35mm is suitable for 8x11. The format demands special resolution requirements.
Why 8x11 poses special requirements
The Minox negative is 88 mm² in size — about 1/10 the area of a 35mm negative. To enlarge a Minox negative to A4, you need a magnification of ~27×. For 35mm, it’s only ~8×. Every pixel counts.
Overview of the methods
| Method | Effective resolution | Cost | Speed | Recommendation |
|---|---|---|---|---|
| Flatbed scanner (e.g. Epson V600) | ~3200 dpi | €250 | Slow | No Not sufficient |
| Plustek 8200i | ~5000–7200 dpi | €400 | Slow | Warning: possible, holder needed |
| Compact camera + magnifier | ~10000 ppi | €110 | Medium | Budget surprise |
| DSLR/mirrorless + macro | ~6000–12000 ppi | €150–300 | Fast | Best quality |
| Smartphone + macro lens | ~5000 ppi | €10–30 | Fast | For beginners |
Flatbed scanner — why it’s not enough
Most flatbed scanners have an optical resolution of ~3200 dpi. For an 8×11mm negative, this results in an image of about 1000×1400 pixels — less than 1.5 megapixels. Not recommended.
DSLR/mirrorless + copy stand — the best method
Camera scanning is clearly the superior method for 8x11:
- Resolution: A 24MP APS-C sensor with 1:1 macro delivers ~12000 ppi on the negative
- Speed: 10 seconds per frame
- Color accuracy: Raw light + RAW data = maximum control
- Flexibility: The same equipment scans 35mm, 120, and 4x5
Software for post-processing
- Negative Lab Pro — Lightroom plugin, premium standard (~$99)
- darktable negadoctor — Open source, free
- FilmLab — Standalone app, also for smartphones
- Topaz DeNoise AI — AI noise reduction for high-ISO scans
7. Digitizing with the Ausgeknipst Setup

Scene from our workflow video — video at 8:38 · Product: Film Scanner Set for Minox 8x11
If you want to get the best out of your Minox negatives, you need a well-thought-out camera scanning setup. We show you our modular system — from the base plate to the finished image.
The Complete System at a Glance


Purple = Minox-specific · Gray = Shared (all formats)
Copy Stand MK2

Scene from our workflow video — video at 8:25 · Product: Copy Stand MK2
Ausgeknipst Copy Stand MK2 (SKU 1602b) — 60cm aluminum profile on 20mm screen-printed board, CNC-milled profile mount, 3/8" tripod thread, 2× fast-lock clamps. Tool-free assembly and disassembly in seconds.
CineStill CS-LITE + CSL Adapter
CineStill CS-LITE (SKU 1725v) — SpectraColor full-spectrum LED with CRI 97+. The CSL Adapter Mini (SKU 1664p) connects the CS-LITE light-tight to the scanner — no stray light.
Film Scanner Set Minox 8x11
Film Scanner Set Minox 8x11 (SKU 1651b) — Dedicated 9.2mm film channel, dual S-curve for perfect flatness, 4 neodymium magnets, matte black (PLA+).
Hood S + Extension Tubes
Mini Lens Hood (Hood S) (SKU 1661p) — Stray light protection. Extension Tubes (40mm + 60mm) — Proper working distance for macro lenses.
Camera and Lens Recommendations
| Sensor | Sample Cameras | Effective resolution |
|---|---|---|
| APS-C 24MP | Sony a6000/a6400, Fuji X-T3 | ~10000+ ppi |
| Full frame 24MP | Sony a7 III, Nikon Z5 | ~8000+ ppi |
| Full frame 42–61MP | Sony a7R IV, Nikon Z7 | ~14000+ ppi |
Conclusion: APS-C with 20+ MP is more than enough. Full frame is a bonus but not a must.
Macro lenses: Venus Laowa 65mm f/2.8 2× Ultra Macro (APS-C), Sony 90mm f/2.8 Macro, Nikkor Z MC 50mm f/2.8, Canon RF 100mm f/2.8 L Macro.
The workflow: From negative to finished image
- Set up — Copy Stand → CS-LITE → Adapter → Scanner → Hood
- Mount camera — On the 3/8" mount, align vertically
- Live View + Focus Peaking — Focus on film grain
- Insert frame — Slide film into scanner, attach top plate
- Capture + Transport — Photograph frame (2s timer), advance film, position next section
- Post-Processing — Import → Negative Conversion → Crop → Denoise → Export
Sets and Prices
| Set | Contents | Price |
|---|---|---|
| Basic | Film Scanner Minox 8x11 + Top Plate | €59,95 |
| Pro | Basic + Hood S + CSL Adapter Mini + CineStill CS-LITE | €139,95 |
| Full | Pro + Copy Stand MK2 + Extension Tubes | €289,95 |
Recommendation: If you already have a copy stand or a light source, the Basic Set is enough. For a new setup, the Full Set is the best start — everything fits perfectly together and you save compared to buying individually.
Unsure which scanner set you need?
3 questions, personalized recommendation – in under 60 seconds.
Interactive product range diagram
All components in layered structure — clickable with direct shop links.
Related Guides
The 110 pocket format (16mm) uses almost the same workflow and tool family — film cutters, refill cartridges, development spirals, and the modular scan setup are available for both formats:
- 110 Pocketfilm: The complete guide — cutting, loading, developing, scanning — the sister tutorial for the 16mm format.
- Cutting 110 format correctly and loading cartridges — detailed tips for cutting without perforation.
- 110 Pocketfilm — The best cameras for the miniature format — if you want to get into the 110 format alongside the Minox.
All blog articles at a glance
Guides, tips, and technical background on analog photography and film scanning.
Minox 8x11 Overview
Find all matching products, films, and adapters in our overview.
About the Minox 8x11 System