


Minox 8x11 Submin Guide: Cutting Film, Loading Cassettes, Developing It Yourself and Scanning
Community tip: moments-of-now.com Thomas Siepmann has been documenting his experience with Minox cameras for years in detailed guides and film tests. If you’re just starting out with a Minox, that’s the first place to read. Visit the blog.
Original Minox film is no longer made, yet you can still shoot any 35mm film in a Minox 8x11 today. You slit it down to 9.2 mm wide and load it yourself into a refillable cartridge. You can develop it at home, and for scanning, a camera with a macro lens works best. It sounds more complicated than it is, and a single roll of 35mm is enough for several Minox films. The real challenge of this format lies elsewhere: the negative has roughly a tenth of the area of a 35mm negative, so every bit of grain and every trace of camera shake gets enlarged along with it. Our advice for getting started: a Minox B, whose light meter needs no battery, and the finest-grained film you can still shoot handheld.
Contents
- Which Minox should you start with?
- Buy ready-loaded film or load your own?
- Cartridges and tools for loading your own film
- What should you watch out for when shooting?
- Send it to a lab or develop it yourself?
- Scanning methods compared
- Scanning with the Ausgeknipst setup
The complete workflow on video
Before we get into the details: in this 10-minute demo, Antonio walks you through the whole process: cutting the film (1:46), loading the cartridge (3:21), developing (6:07) and scanning (8:15). Everything this guide explains step by step, shown in one go.
1. Which Minox should you start with?

Photo: Central Intelligence Agency (CIA), public domain via Wikimedia Commons
Minox cameras are tiny, yet built with real precision. But which model is the right one for you? Here are the models that matter at a glance, along with a clear buying recommendation.
The Minox family at a glance
Almost every 8x11 Minox camera works on the same basic principle: a sliding body, a fixed 15mm lens, scale focusing and a film advance that winds on the film each time you close and open the camera. Most bodies are metal; the EC and ECX have a plastic body and fixed focus.
| Model | Production years | Lens | Shutter | Light meter | Battery | Used price |
|---|---|---|---|---|---|---|
| Minox A / IIIs | 1948–1969 | 15mm f/3.5 Complan | 1/2–1/1000s + B | None | None | €140–280 |
| Minox B | 1958–1972 | 15mm f/3.5 Complan | 1/2–1/1000s + B | Selenium (built-in) | None | €180–370 |
| Minox BL | 1972–1973 | 15mm f/3.5 Complan | 1/2–1/1000s + B | CdS | PX675 | €230–420 |
| Minox C | 1969–1978 | 15mm f/3.5 Complan | 1/15–1/1000s, auto up to approx. 10s | CdS + auto | PX27 (5.6V) | €280–460 |
| Minox EC | From 1981 | 15mm f/5.6 Minox (fixed focus) | 8s–1/500s (auto only) | CdS | PX27 (5.6V) | €230–370 |
| Minox LX | 1978–1990s | 15mm f/3.5 Minox | 1/2000–15s + B/T | Silicon (SBC) | PX27 or adapter | €370–650 |
| Minox TLX | From 1995/96 | 15mm f/3.5 | Auto + manual | CdS | Button cell | €320–550 |
| Minox CLX | 1980s–1990s | 15mm f/3.5 | Auto | CdS | Button cell | €280–460 |
Our pick: Minox B or Minox A
For getting started, we recommend the Minox B, for one simple reason: the B doesn’t need a battery. Its selenium meter generates its own power from the light and still gives usable readings after 60+ years (provided the selenium cell is still intact). On top of that, the B is by far the most common model on the used market, and spare parts and CLA services (clean, lube, adjust) are available.
The Minox A (or IIIs) is the purist’s choice: fully mechanical, with no light meter. That means it needs no battery and has few parts that can fail. You estimate exposure with the Sunny 16 rule or take a reading with a smartphone app.
Budget tip: Minox EC. The cheapest option, fully automatic and foolproof. The downside: no manual control, and it depends on a battery (PX27 required).
What to check when buying used
- Test the sliding mechanism: the camera must open and close cleanly, with no resistance or scraping
- Check the focus wheel: it must turn evenly all the way from 20cm to infinity
- Listen to the shutter: click through all the speeds and listen for a consistent sound
- Light meter (on the B/BL/C): test it in different lighting conditions and compare it against a smartphone app
- Film advance: opening and closing the camera should advance the frame counter
- CLA service: a serviced camera is worth its weight in gold. Budget: ~€80–120 at a specialist repairer
Where to buy: eBay (including international listings), Kleinanzeigen, the Photrio.com forum, Minox clubs, local flea markets.
Non-Minox cameras for 8x11
- Yashica Atoron (from 1965; in Germany also sold through the Quelle mail-order catalogue as the Revue mini-star): 18mm f/2.8, selenium meter. Only its successor, the Atoron Electro (from 1971), meters with a CdS cell and sets the exposure automatically. Cheaper than a Minox (€90–180) and a solid way into the world of 8x11, but not as well made as the original Minox cameras.
- VEF Riga: the historic forerunner of the Minox (made in Latvia from 1938 into the Second World War). A collector’s piece with focus adjustment (from 20cm) and no light meter. Because of its high collector value, we recommend no longer using the VEF Riga as a shooting camera. Our film cassettes don’t fit the VEF Riga, as its cassette dimensions are slightly different.
2. Buy ready-loaded film or load your own?

Photo: Wikimedia Commons, Minox Film Slitter
Original Minox film is no longer made, but that’s not a problem. Today there are two ways to get film: buy it ready-loaded or load it yourself. Loading your own is cheaper and lets you choose freely from the entire range of 35mm film.
Option 1: Buy ready-loaded Minox film
There are still a few sources of ready-loaded 8x11 film:
- Blue Moon Camera (USA): subminiature film specialist, ~$26/roll
- Fotoimpex (Germany): occasionally has Minox film in stock
- NOS (New Old Stock): original Minopan, Minocolor or Minox SPY film on eBay. Be careful: it’s often 20+ years past its expiry date
Pre-loaded film is ideal when you’re starting out: you get to know the camera without having to deal with loading at the same time. In the long run, though, it gets expensive.
Option 2: Load your own film
The numbers are simple: a film slitter cuts a roll of 35mm film (€5–15) lengthwise into two 9.2mm strips running the full length of the film. That gives you four full 36-exposure Minox films plus two shorter ones with 15-18 exposures. It works out at ~€1-3 per Minox film instead of ~$26 for pre-loaded film (Blue Moon Camera, as of November 2026).
Here’s what you need:
Disclaimer: We sell some of the products mentioned here. Even so, this article is meant first and foremost as a helpful guide, not as a sales pitch.
- A film slitter, e.g. our Ausgeknipst film slitter or the Camerhack Slitter
- A refillable cassette, e.g. our Ausgeknipst film cassette
You’ll find the details on slitting and loading in Section 3.
Which film works in the 8x11 format?
In principle, any 35mm or 120 film will work; it just has to be cut down to 9.2mm wide. Here are our recommendations by use:
Black & White
| Film | ISO | Strengths | Best for |
|---|---|---|---|
| Ilford FP4+ | 125 | Fine grain, high resolution | Landscape, architecture |
| Ilford HP5+ | 400 | Versatile, pushes well | Street, travel, all-rounder |
| Kodak Tri-X 400 | 400 | Legendary grain, high contrast | Street, documentary |
| ADOX CMS 20 II | 20 | Highest resolution (up to 800 lp/mm) | Maximum sharpness |
| Fomapan 100 | 100 | Budget option, nice grain | Getting started, experimenting |
Color (C-41)
| Film | ISO | Strengths | Best for |
|---|---|---|---|
| Kodak Ektar 100 | 100 | Ultra-fine grain, high resolution | Landscapes, best color rendition |
| Kodak Gold 200 | 200 | Warm tones, affordable | Everyday shooting, travel |
| Kodak Portra 400 | 400 | Natural skin tones | Portraits, people |
| CineStill 50D | 50 | Cinematic color rendition | Daylight, images with character |
What film speed such a small format calls for
With the 8x11 format, the limiting factor is the resolution of the negative, not the camera. The tiny negative (8×11mm = 88 mm²) has to be enlarged a great deal, and every bit of grain structure in the film becomes a problem.
Rule of thumb: ISO 50–100 gives you the best results. ISO 400 is the practical compromise. Go any faster and the grain takes over and eats up fine detail.
Megapixel equivalent
| Film | Resolution (lp/mm) | Theoretical MP equivalent |
|---|---|---|
| Kodak Gold 200 | 50 | ~1.5 MP |
| Kodak Ektar 100 | 100 | ~5 MP |
| Ilford FP4+ | 120 | ~7 MP |
| ADOX CMS 20 II | 400 (lens-limited) | ~15–20 MP |
In practice, you get 3–8 MP of effective resolution, depending on the film, focus and camera shake. That’s enough for social media, websites and smaller prints (up to about A5).
Fast films and light leaks: Films rated ISO 800 and above (especially Ilford Delta 3200) are extremely sensitive to light, and the small cassette gives less protection against light than a 35mm canister. Our advice: stick with ISO 400 and push it in development.
3. Cassettes and tools for loading your own film

Scene from our workflow video, from 4:52 in the video · Product: Film cassette for Minox 8x11
Loading your own film sounds more complicated than it is. With the right tools the whole job takes less than 10 minutes, and you save around 85% compared with ready-loaded Minox film.
What you need
- A film slitter to cut 35mm film down to 9.2mm wide
- A refillable cassette that holds the film and fits in the camera
- Tape to fix the start of the film to the spool
- A storage canister for the loaded cassette
The film slitter
Ausgeknipst Film Slitter (SKU 1591p)
- Cuts 35mm, 120 or 16mm film to the exact 9.2mm Minox width
- Modular design: interchangeable inserts for different source formats
- Slitting is done in the dark or in a changing bag, as the slitter itself isn’t light-tight
- Safety lid prevents it from being opened by accident
Camerhack Daylight Slitter (~$35): A simpler design that works well. It splits a 35mm roll lengthwise into two 9.2mm strips, which between them give you four 36-exposure Minox films plus two shorter ones.
The film cassette
Ausgeknipst Film Cassette (Refill) 8x11 (SKU 1522b)
- Reproduction cassette for 36 exposures
- 4-part construction: cassette body, spool, 2 caps (only one with a hole all the way through)
- Compatible with: Minox A, B, BL, C, EC, LX, TLX, CLX, MX, Sharan, Yashica Atoron
- LX cameras: the frame counter resets automatically when you load a cassette
Only use 36-exposure cassettes. The 15-exposure cassettes have a different spool diameter and won’t fit every camera model.
Loading film step by step
Preparation (you can handle the tape and cassette in the light, but the film only in the dark):
- Slit the film: In total darkness or in a changing bag, load the 35mm film into the slitter and cut it to 9.2mm
- Prepare the tape: Cut a piece of tape 9mm high and about 45mm long
- Get the cassette ready: Take off both caps and lay out all four parts within easy reach
Loading (in COMPLETE darkness!):
- Attach the start of the film: Use the tape to fix the start of the film to the spool
- Roll it up tightly: Carefully and evenly wind the film into a small, tight roll (not around the spool), with the emulsion side facing in
- Insert: Hold the cassette body with the open chambers facing up and the lips (the two slots the film runs through) facing away from you. Put the spool in the left chamber and the film roll in the right one, taking care not to kink the film at the lips
- Close the cassette: First fit the cap without the through-hole onto the film roll, then the one with the hole onto the spool. Each cap only clicks into place on its own chamber. Use the hole to center the spool, with a small pair of pliers if needed
- Straight into the canister: Put the loaded cassette straight into its storage canister
Tips from experience (source: moments-of-now.com):
- A changing bag (dark bag) is cheaper than a whole darkroom
- The first time, practice with an old film in the light so you understand how everything works
- The spool should turn freely; if it catches, roll the film up again
Video tutorial: Loading film step by step
In his detailed tutorial, Andrew Long walks through the entire loading process on an original Minox cassette, from preparation to the finished cassette:
Real-world test: Feedback from the community
Independent test by Thomas Siepmann (moments-of-now.com): Thomas tested our cassette in a Minox A with an ISO 200 film and had it developed by a professional lab:
- Light-tightness: Light-tight enough as long as you handle it properly. Even when deliberately exposed to harsh midday sun (EV 15), only a trace of light gets in at the end of the film, and swapping cassettes in the shade as usual is no problem at all.
- Film advance: Even spacing between frames, no extra resistance.
- Scratches: No visible scratches on the developed film.

Test strip from a Minox A: correct frame spacing, no scratches. Slight light leak at the end of the film, and only under deliberate extreme exposure (EV 15). Photo: Thomas Siepmann / moments-of-now.com
4. What should you watch out for when shooting?

Photo: Wikimedia Commons, Minox EC & LX
Shooting 8x11 has its own rules. The negative is tiny, so every mistake in exposure, focus or camera shake gets mercilessly enlarged. Here are a few things that make all the difference.
Getting the exposure right
Cameras with a built-in meter (B, BL, C, EC, LX): On most models, the built-in meters are surprisingly usable. If you’re unsure, check them against a smartphone app (e.g. LightMeter or PhotoMate).
Cameras without a meter (Minox A): The aperture is fixed (f/3.5), so you only set the shutter speed. That means you have to convert the Sunny 16 rule (sun: f/16 at 1/ISO): in sunshine your shutter speed is around 20 times faster than 1/ISO, under overcast skies around 5 times, and in the shade around 2.5 times.
Getting the hang of scale focusing
Every Minox except the EC and ECX uses scale focusing. The trick: use the hyperfocal distance. At f/3.5 and a 15mm focal length, depth of field is surprisingly generous. Set the focus to ~4 m and everything from ~2m to infinity will be sharp. For street photography, just set it to 4 m and forget about it.
Camera shake is the biggest problem with 8x11
With the 8x11 format, camera shake is far more critical than with 35mm, because the negative has to be enlarged much more.
- At least 1/125s for sharp handheld shots
- Hold the camera steady: brace your arms or lean against a wall
- Press the shutter release gently, don’t jab it
Composing for 8x11
- Simple subjects work best: one clear main subject, as few distractions as possible
- High contrast helps: contrasty scenes look better than flat ones
- Get close: Minox shots work best when you move in on your subject, not as wide-angle panoramas
Practical checklist
- Carry a spare cassette (loaded and in its case)
- Only change cassettes in subdued light
- Check the camera before each shot: has the frame counter advanced?
- In cold weather: let the camera warm up slowly (condensation can form)
5. Send it to a lab or develop it yourself?
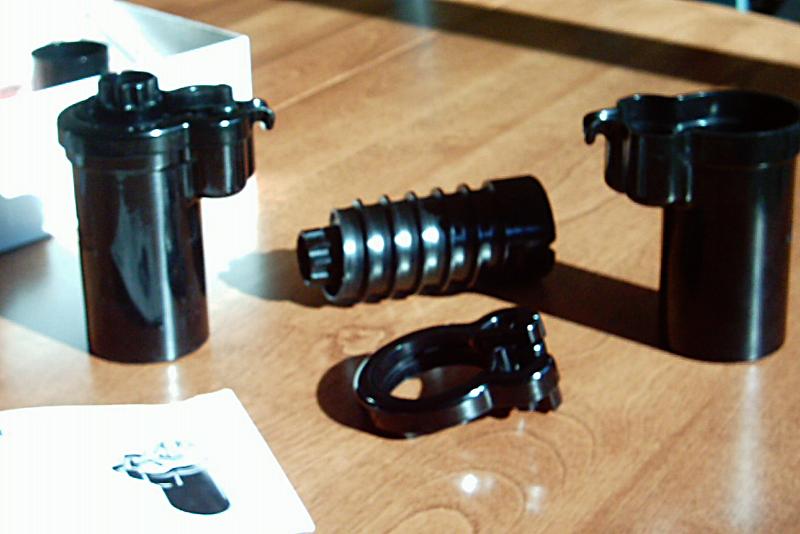
Photo: Wikimedia Commons, Minox Daylight Development Tank
Your Minox film is exposed, and now it needs developing. This is where a lot of beginners start to hesitate, because 8x11 doesn’t fit into the standard workflow at most photo labs. You have two options.
Option 1: Have a lab develop it
The biggest hurdle: most labs can’t process 8x11. But there’s a clever workaround:
The C-41 trick: respool your Minox film into a 35mm canister: In the dark, take the Minox film out of its cassette and wind it into an empty 35mm film canister. Drop it off at a regular lab, and their machine will process it like any other roll. Label it clearly: “Do not cut film!” Cost: ~€5 per roll, with a turnaround of about 1 hour. This only works for C-41 (color negative). Source: Thomas Siepmann / moments-of-now.com
Specialist labs for 8x11:
- Fotoimpex (Germany): analog photography specialist
- Blue Moon Camera (Portland, USA): subminiature specialist
- ag photographic (UK): subminiature developing and scanning
Option 2: Develop at home

Scene from our workflow video, at 6:40 in the video · Product: 8x11 Developing Reel (Paterson & Jobo)
Developing your own film gives you full control over the process and works out much cheaper than a lab in the long run. The standard Jobo and Paterson reels are made for 35mm, and 8x11 simply won’t fit. That’s why we designed dedicated reels:
| Product | SKU | Tank compatibility | Price |
|---|---|---|---|
| Ausgeknipst 8x11 Reel for Jobo | 1506 | Jobo 1500 series | €29.95 |
| Ausgeknipst 8x11 Reel for Paterson | 1505 | Paterson Super System 4, AP, Kaiser | €29.95 |
How black-and-white development works
- Loading the reel (in the dark or in a changing bag): Feed the film strip onto the 8x11 reel. Before you start, trim both corners of the leading end at a 45-degree angle so the film comes to a point. The reel has to be completely dry, otherwise the film will stick in the guide. Just like with Paterson reels for 35mm and 120, you twist the two flanges back and forth against each other. Unlike those reels, though, this one has no ball bearings at the entry to grip the film: guide the film in at the entry slot with your thumb, or it will slip back out as you turn. If it catches, pull it back a little and start again rather than forcing it. Film that jumps out of the groove ends up touching the neighboring turn, and the chemistry can’t reach it there. Practice once in daylight with a scrap strip first, and loading in the dark becomes much easier.
- Developer, e.g. Rodinal 1+50, 10–12 min at 20°C
- Stop bath: 30 seconds
- Fixer: 5 minutes
- Wash: 10–15 minutes in running water
- Wetting agent: a drop of Agepon or dish soap to prevent water spots
- Dry: hang the film up somewhere dust-free
Developing C-41 color film at home
With a C-41 kit (e.g. CineStill Cs41, Tetenal Colortec) you can develop color film at home too. Temperature is critical: 38°C ± 0.5°C. One kit is good for ~16–24 rolls.
6. Scanning methods compared

Photo: Wikimedia Commons, Original Minox Copystand
Your film is developed, and now those tiny negatives need to become digital images. Not every method that works for 35mm is up to the job with 8x11, because the format makes particular demands on resolution.
Why 8x11 is so demanding
A Minox negative measures just 88 mm², roughly 1/10 the area of a 35mm negative. To get a Minox negative up to A4, you need to enlarge it ~27×, compared with only ~8× for 35mm. Every pixel counts.
The methods at a glance
| Method | Effective resolution | Cost | Speed | Our pick |
|---|---|---|---|---|
| Flatbed scanner (e.g. Epson V600) | ~3200 dpi | €250 | Slow | Not good enough |
| Plustek 8200i | ~5000–7200 dpi | €400 | Slow | Workable, needs a holder |
| Compact camera + loupe | ~10000 ppi | €110 | Moderate | Surprise budget pick |
| DSLR/mirrorless + macro | ~6000–12000 ppi | €150–300 | Fast | Best quality |
| Smartphone + macro lens | ~5000 ppi | €10–30 | Fast | Good for getting started |
Why a flatbed scanner isn’t enough
Most flatbed scanners have an optical resolution of around 3200 dpi. On an 8×11mm negative, that only gets you an image of roughly 1000×1400 pixels, which is less than 1.5 megapixels. Not recommended.
DSLR or mirrorless camera on a copy stand
Camera scanning is clearly the better method for 8x11:
- Resolution: A 24MP APS-C sensor with a 1:1 macro lens gives you ~6500 ppi on the negative
- Speed: 10 seconds per frame
- Color accuracy: A high-CRI light source and RAW files give you full control over color
- Flexibility: The same gear scans 35mm, 120 and 4x5
Post-processing software
- Negative Lab Pro: Lightroom plugin, the premium standard (~$99)
- darktable negadoctor: open source and free
- FilmLab: standalone app, also available for smartphones
- Topaz DeNoise AI: AI noise reduction for high-ISO scans
A trick for the conversion: With tiny 8x11 negatives, the film border and the holder take up a lot of the frame and throw off the software’s automatic analysis. So Marco Andrés first crops the scan down to a small area inside the image, sets the conversion on that, and then expands the crop back out to the whole negative. The settings from the small crop stay in place.
7. Scanning with the Ausgeknipst setup

Scene from our workflow video, at 8:38 in the video · Product: Film Scanner Set for Minox 8x11
For Minox negatives, we’ve put together a modular camera scanning setup.
The complete system at a glance


Purple = Minox-specific · Grey = shared (all formats)
Copy Stand MK2

Scene from our workflow video, starting at 8:25 · Product: Copy Stand MK2
Ausgeknipst Copy Stand MK2 (SKU 1602b): 60cm aluminium extrusion on a 15mm film-faced plywood base, CNC-milled column mount, 3/8" tripod thread and a Fast-Lock clamping lever on the camera mount. You put it together with the included Allen key.
CineStill CS-LITE + CSL Adapter
CineStill CS-LITE (SKU 1725v): SpectraColor full-spectrum LED with a CRI of 97+. The CSL Adapter Mini (SKU 1664p) joins the CS-LITE to the scanner with a light-tight fit, so no stray light gets in.
Film Scanner Set Minox 8x11
Film Scanner Set Minox 8x11 (SKU 1651b): Dedicated 9.2mm film channel, a dual S-curve that keeps the film perfectly flat, 4 neodymium magnets, matte black finish.
Hood S + Extension Tubes
Lens Hood Mini (Hood S) (SKU 1661p): Keeps stray light out. Extension Tubes (40mm + 60mm): Give you the right working distance for macro lenses.
Camera and Lens Recommendations
| Sensor | Example cameras | Effective resolution |
|---|---|---|
| APS-C 24MP | Sony a6000/a6400, Fuji X-T3 | ~10,000+ ppi |
| Full frame 24MP | Sony a7 III, Nikon Z5 | ~8,000+ ppi |
| Full frame 42–61MP | Sony a7R IV, Nikon Z7 | ~14,000+ ppi |
APS-C with 20+ MP is all you need. Full frame is a nice bonus, but not a must.
Macro lenses: Venus Laowa 65mm f/2.8 2× Ultra Macro (APS-C), Sony 90mm f/2.8 Macro, Nikkor Z MC 50mm f/2.8, Canon RF 100mm f/2.8 L Macro.
The workflow: from negative to finished image
- Set up the rig: Copy Stand → CS-LITE → Adapter → Scanner → Hood
- Mount the camera: attach it to the 3/8" mount and line it up vertically
- Load a frame: slide the film into the scanner and put the Top Plate on
- Live view + focus peaking: focus on the film grain
- Shoot and advance: photograph the frame (2s timer), move the film along and line up the next frame
- Post-processing: import → negative conversion → crop → denoise → export
Sets and prices
| Set | What’s included | Price |
|---|---|---|
| Film holder | Film Scanner Minox 8x11 + Top Plate | €59.95 |
| With light source | Film holder + Hood S with extension tubes + CSL Adapter Mini + CineStill CS-LITE | €179.95 |
| With copy stand | “With light source” + Copy Stand MK2 | €289.95 |
Our recommendation: If you already have a copy stand and a light source, the “Film holder” set is all you need. If you’re starting from scratch, the “With copy stand” set is the best way in: everything fits together perfectly, and you save compared with buying the parts separately.
Not sure which scanner set you need? The Finder asks you 3 questions and points you to the right set in under 60 seconds. Go to the Film Scanner Finder.
Interactive product diagram: every component shown layer by layer, clickable with direct links to the shop. Open the diagram.
Related guides
The 110 pocket format (16mm) uses almost the same workflow and the same family of tools. Film slitters, refillable cartridges, developing reels and the modular scanning setup are available for both formats:
- 110 Pocket Film: The Complete Guide to Slitting, Loading, Developing and Scanning, the sister tutorial for the 16mm format.
- How to Cut 110 Film Properly and Load Cartridges. Detailed tips on cutting film without perforations.
- 110 Pocket Film: The Best Cameras for the Miniature Format, in case you’d like to get into 110 alongside your Minox.
All our blog articles at a glance: guides and technical background on analog photography and film scanning. Go to the blog overview.
Minox 8x11 overview
Find all the matching products, film and adapters in our overview.
Explore the Minox 8x11 system
2 comments
Hallo Christian,
danke dir für das Feedback!
Zu deinen beiden Fragen:
1. Für 36 Bilder auf Minox 8×11 brauchst du eine Filmlänge von etwa 50 cm. Ein Standard-Kleinbildfilm mit 36 Bildern reicht in der Länge also locker für mehrere Minox-Füllungen, da man ihn der Länge nach in Streifen schneidet.
2. Den Wickeldorn haben wir selbst entwickelt und gefertigt. Unsere STL- oder CAD-Dateien geben wir allerdings grundsätzlich nicht heraus, auch nicht gegen Bezahlung. Dahinter steckt zum einen der Schutz vor Nachbauten, zum anderen hängt ein sauberer Druck stark vom individuellen Setup ab, was einen enormen Support-Aufwand bedeuten würde.
Viele Grüße,
Vladi
Moin! Richtig viel und gute Information. Ich habe 2 Fragen: Wenn ich einen 36 Bilder 35 mm schneide – wie viel Länge bekomme ich in die Minox Kasette bzw. brauche ich für 36 Bilder ? In eurem Video zeigt ihr einen kleinen ”Dorn ” mit dem ihr den geschnitten Film stramm wickelt um ihn in den Halter zu bekommen. Habt ihr den selber gedruckt? Gibt es das STL irgendwo? Christian