



Light seal set for analog SLR cameras
Light seal set for analog SLR cameras
Availability for pickups could not be loaded
Sustainability Promise
Sustainability Promise
All our products are made from PLA – a material derived from sugarcane and corn that is 100% biodegradable.
Free shipping in Germany
Free shipping in Germany
With free shipping to your home in 2-3 days.
30-day money-back guarantee
30-day money-back guarantee
You can test any product for 30 days. If you are not satisfied, we will refund the full purchase price including shipping costs. No ifs, ands, or buts.
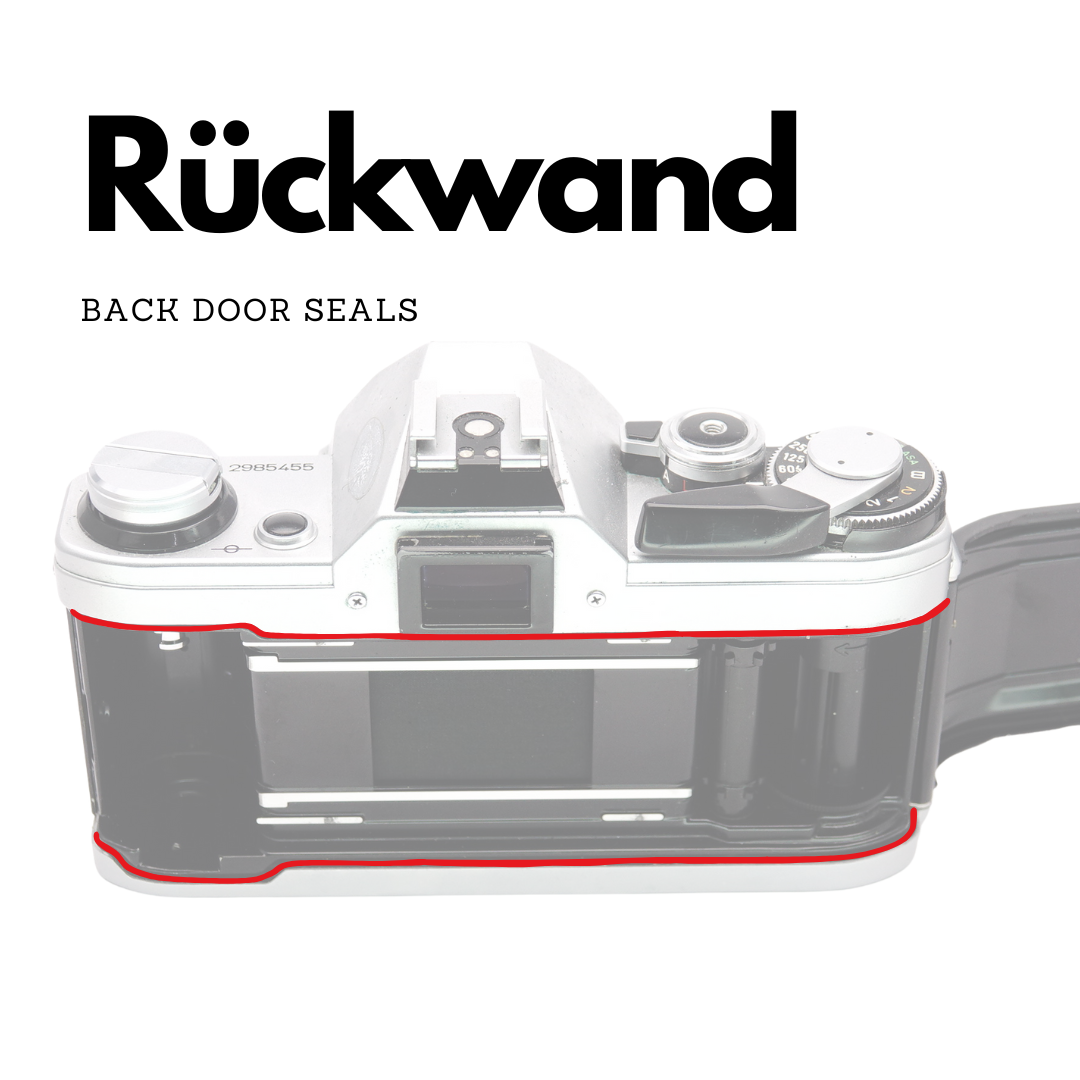
- Fits all 35mm SLR cameras: 517 compatible models from 30 manufacturers: Canon, Nikon, Minolta, Olympus, Pentax, Yashica, and many more. Check your model in the compatibility list.
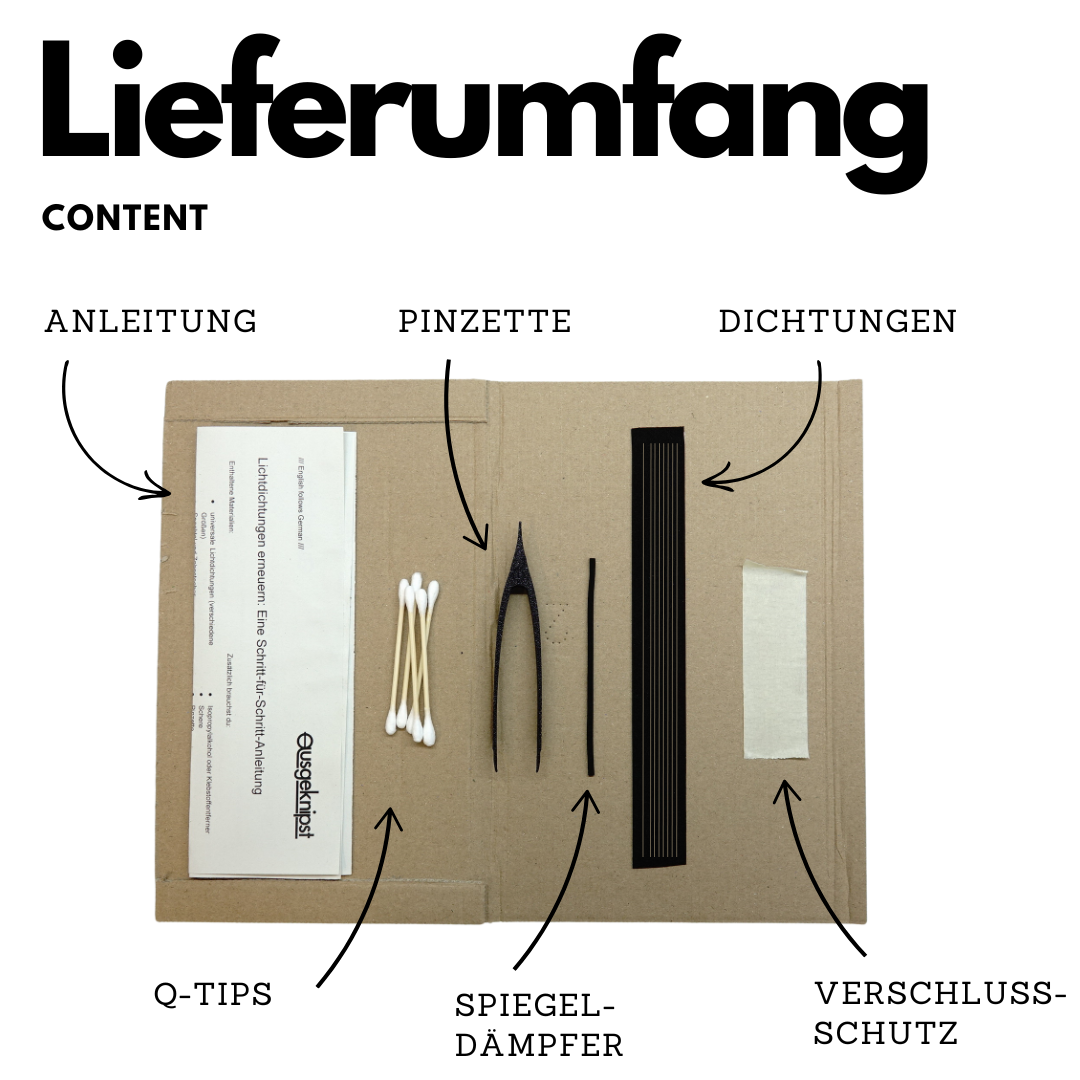
- Complete tool kit for DIY replacement: Self-adhesive sealing strips in 4 widths, mirror bumper, tweezers with scraper (also for peeling off the protective film), cotton swabs, shutter curtain protector, and instructions with a QR code linking to the video. All you need in addition is isopropanol and scissors.
- Achievable even without prior experience: The instructions and step-by-step video guide you through every step, so you can successfully replace the seals even if you have never opened a camera before.
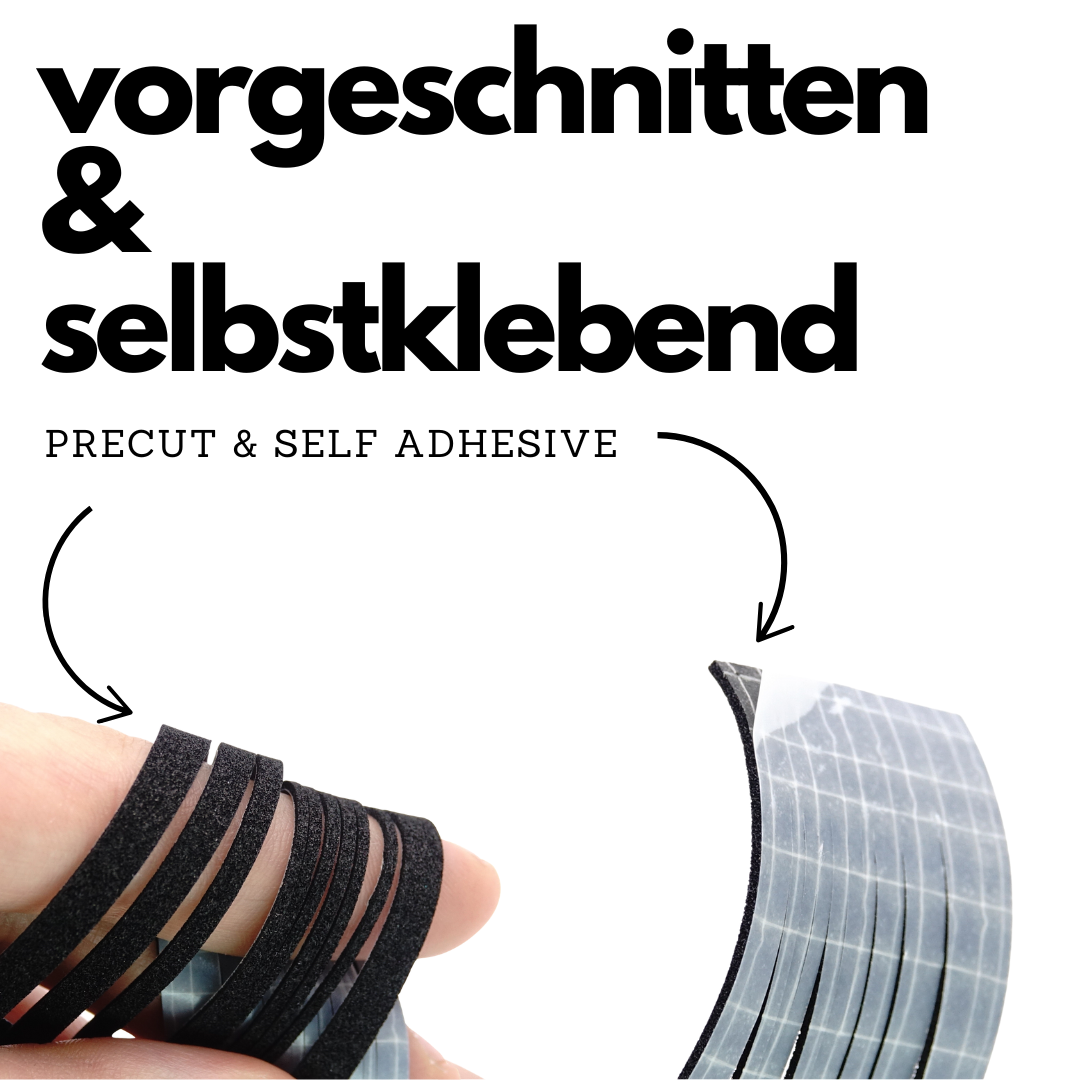
- More material than a pre-cut kit: Universal strips to cut to size, enough for 1–2 or 2–3 cameras depending on the variant, more robust and flexible than contour-cut seals, which can easily tear at the cut edges. Plenty of spare material in case you make a mistake on a tricky section.
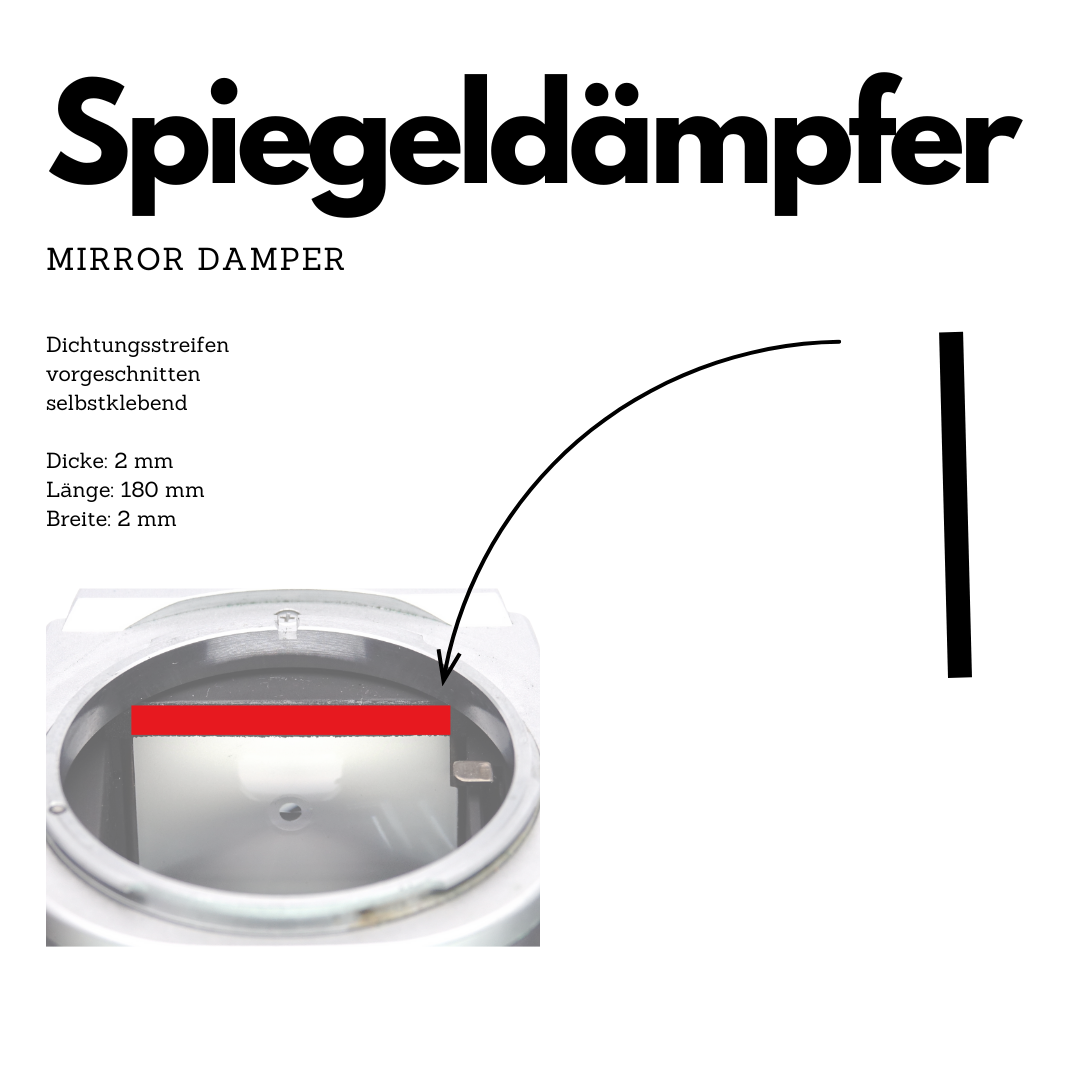
- Mirror bumper included: This often-forgotten wear item is essential: without a functional bumper, the mirror hits the upper stop hard every time you take a picture, causing vibrations that reduce sharpness.
Compatibility
Fits all analogue 35mm SLR cameras with standard seal grooves. The most common models:
- Canon: AE-1, AE-1 Program, A-1, AT-1, AV-1, F-1, FTb, EF, TX, TLb, EX Auto
- Nikon: FM, FM2, FM2n, FE, FE2, FA, FG, FG-20, EM, F2, F3, Nikkormat FTn/FT2/EL
- Minolta: SRT 101/102/303, X-700, X-500, X-300, X-370, X-570, XD-7, XG-1, XG-2, XG-M, XG-9
- Olympus: OM-1, OM-1n, OM-2, OM-2n, OM-2SP, OM-3, OM-4, OM-10, OM-20, OM-30, OM-40
- Pentax: K1000, ME, ME Super, MX, MV, MG, KM, KX, K2, Spotmatic, LX, Super A, P30
- Yashica: FR, FR-I, FR-II, FX-3, FX-3 Super 2000, FX-7, FX-D, TL Electro, Electro AX
- Contax: RTS, RTS II, 137 MA, 137 MD, 139 Quartz, 159 MM, S2, ST, Aria, RX
- Ricoh: XR-7, XR-P, KR-5, KR-5 Super, KR-10, XR-500, XR-2, TLS 401
- Konica: Autoreflex T3, T4, TC, FS-1, FC-1, FT-1, Acom-1, TC-X
- Praktica: MTL 3, MTL 5, MTL 5B, B200, BCA, BC1, BX20, Super TL, LLC, VLC
- Fujica: ST605, ST605n, ST701, ST705, ST801, STX-1, STX-2, AX-5
- Chinon: CE-4, CE-5, CM-3, CM-4, CM-5, CM-7, CP-7
- Cosina: CT-1, CT-1 Super, CT-1A, CT-7, CT-10, CT-20
- Mamiya: MSX 500, DSX 1000, ZE, ZE-2, ZE-X, ZM
- Petri: FT, FT II, FT EE, FTE, FA-1, MF-1, GX-1
- Topcon: RE Super, Super D, Unirex, IC-1 Auto
- Miranda: Sensorex, Sensorex II, Sensorex EE, dx-3, RE-II
- Rollei: SL35, SL35M, SL35E, SL35ME
- Vivitar: V3800N, V4000, 220/SL, 450/SLD
- Zenit: E, EM, ET, TTL, 11, 12, 122
Also fits many rangefinder cameras (e.g. Canonet QL17, Olympus XA), TLRs, and point-and-shoot cameras with a rear-panel seal. If your camera has a foam seal in the rear panel, this kit will work.
View the complete compatibility list: 517 models from 30 manufacturers
Contents
-
For 1–2 cameras:
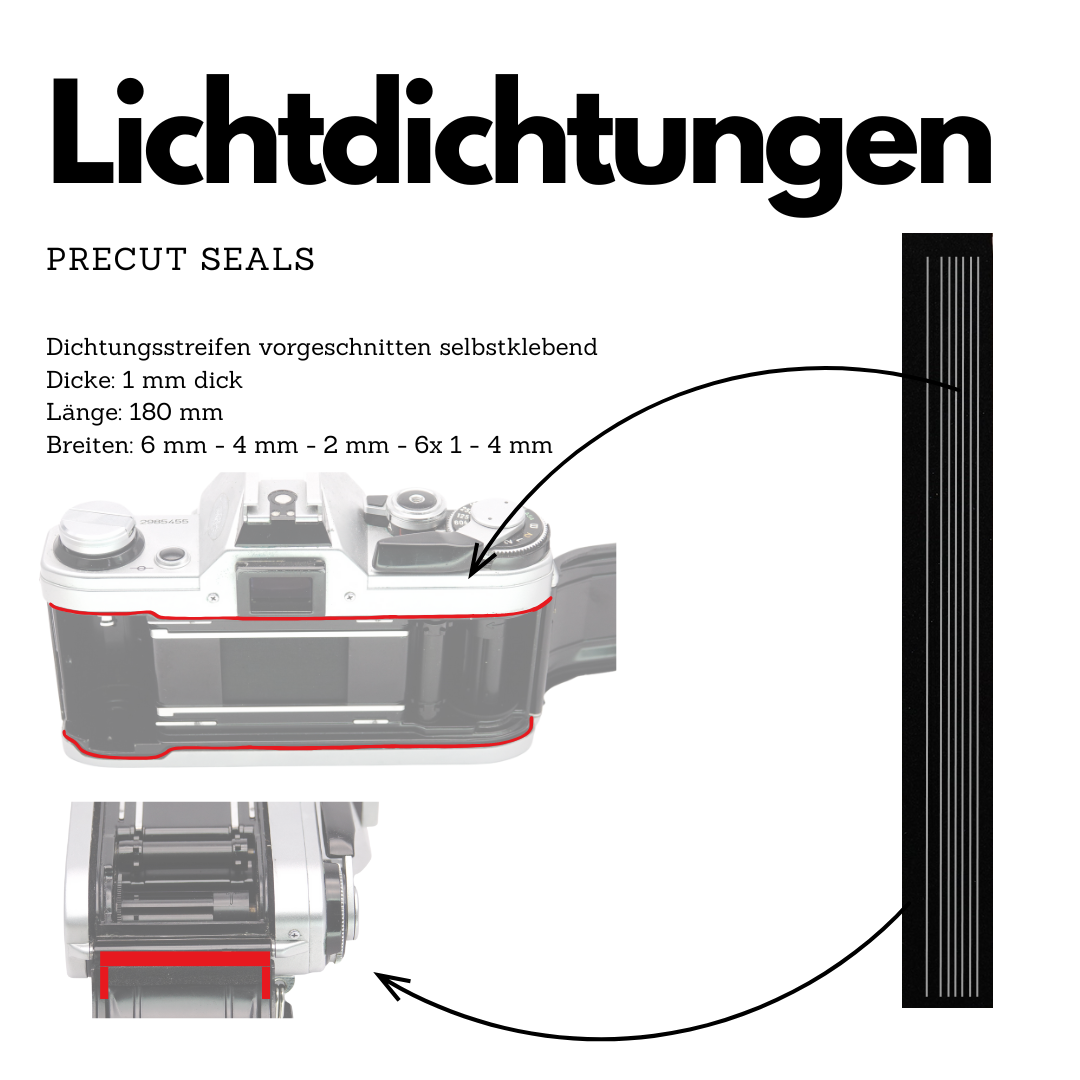
- 1x sheet of pre-cut light-seal strips (self-adhesive, 1 mm thick, 4 widths)
- 1x mirror bumper (self-adhesive strip, 2 mm thick)
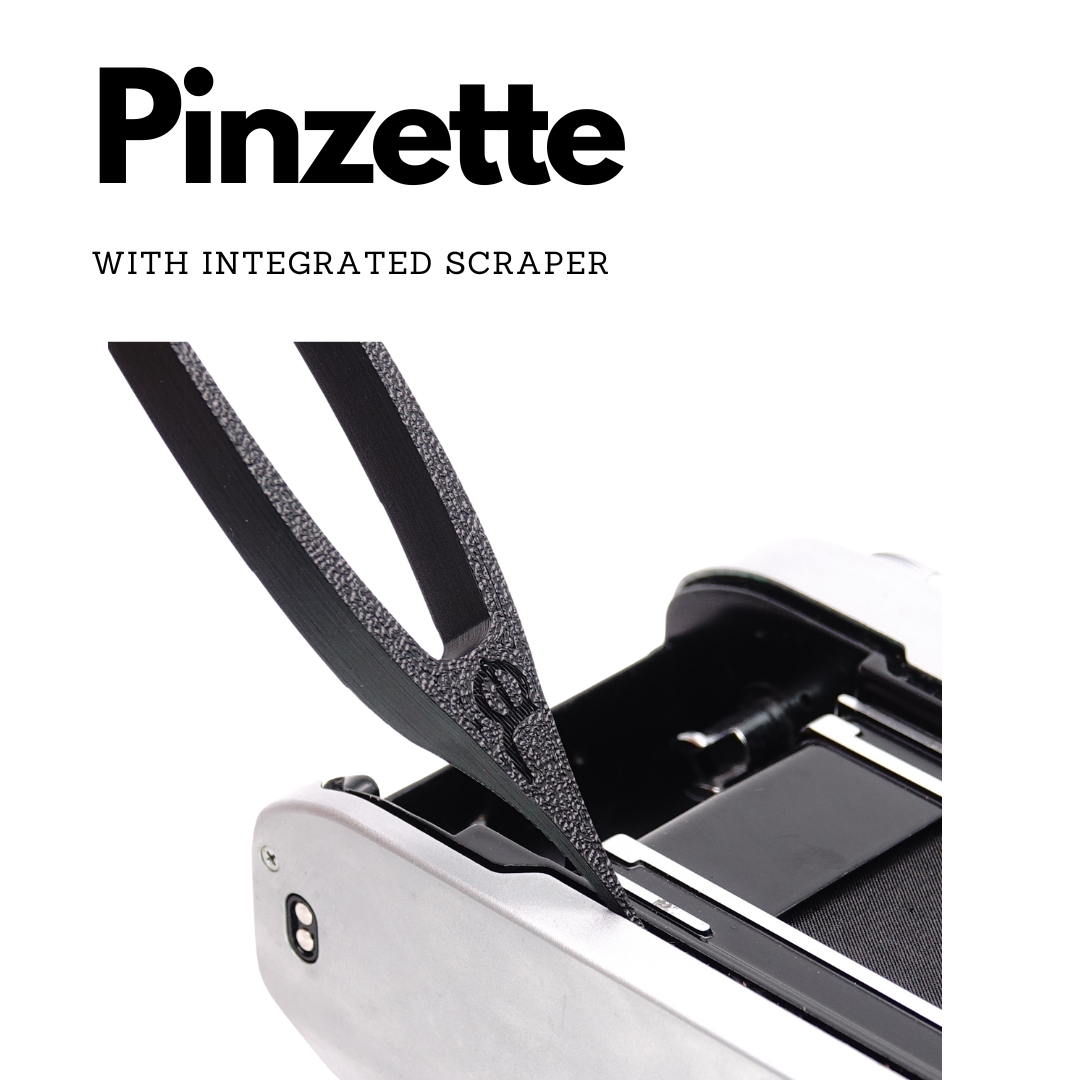
- 1x pair of tweezers with scraper on the back
- 4x cotton swabs
- 1x shutter curtain protector (removes without leaving residue)
- 1x instruction manual (DE/EN)
-
For 2–3 cameras:
- 2x sheets of pre-cut light-seal strips (self-adhesive, 1 mm thick, 4 widths)
- 2x mirror bumpers (self-adhesive strips, 2 mm thick)
- 2x pairs of tweezers with scraper on the back
- 8x cotton swabs
- 2x shutter curtain protectors (removes without leaving residue)
- 2x instruction manuals (DE/EN)
-
With film-window seal (Leica R, Contax, Ricoh):
- 1x sheet of pre-cut light-seal strips (self-adhesive, 1 mm thick, 4 widths)
- 1x mirror bumper (self-adhesive strip, 2 mm thick)
- 1x pair of tweezers with scraper on the back
- 4x cotton swabs
- 1x shutter curtain protector (removes without leaving residue)
- 1x instruction manual (DE/EN)
- 2x seals for the film viewing window in the rear panel (self-adhesive)
Technical details
- Material: Special light-sealing foam (self-adhesive)
- Widths: 1 mm, 1.5 mm, 2 mm, and 3 mm strips
- Thickness: 1 mm (light-seal strips), 2 mm (mirror bumper)
- Type: Universal strips (cut to the required length)
- Quantity: Depending on the variant, enough for approx. 1–2 or 2–3 cameras
Description
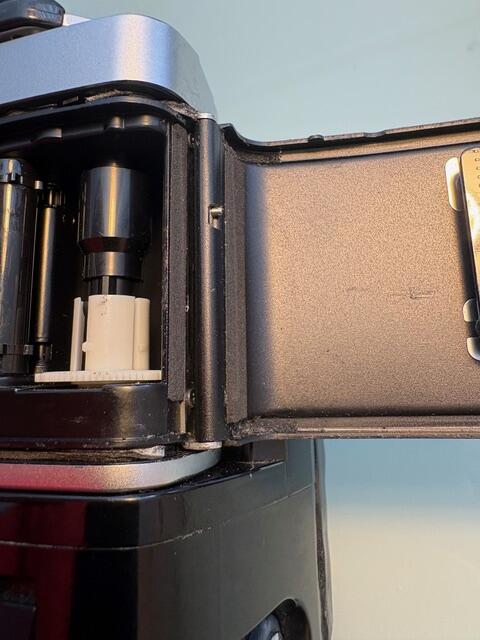
The light seals in your analogue camera break down over the years into a sticky, crumbly mess. In almost every camera from the 1960s to the 1980s, the original sealing foam is gone after 20–40 years. The consequences are twofold: light enters through the leaks and reaches the film, causing bright streaks or spots in your photos. At the same time, the sticky residue migrates into the mechanism, onto the mirror, the shutter curtain, and the film guide.
The vast majority of cameras available on the used market are sold with defective light seals. Unless the seller explicitly mentions otherwise, you can assume that the seals need to be replaced. Apart from isopropanol and scissors, this kit contains everything you need for a DIY replacement. Isopropanol is available online as rubbing alcohol (IPA) or from a pharmacy.
Practical tips
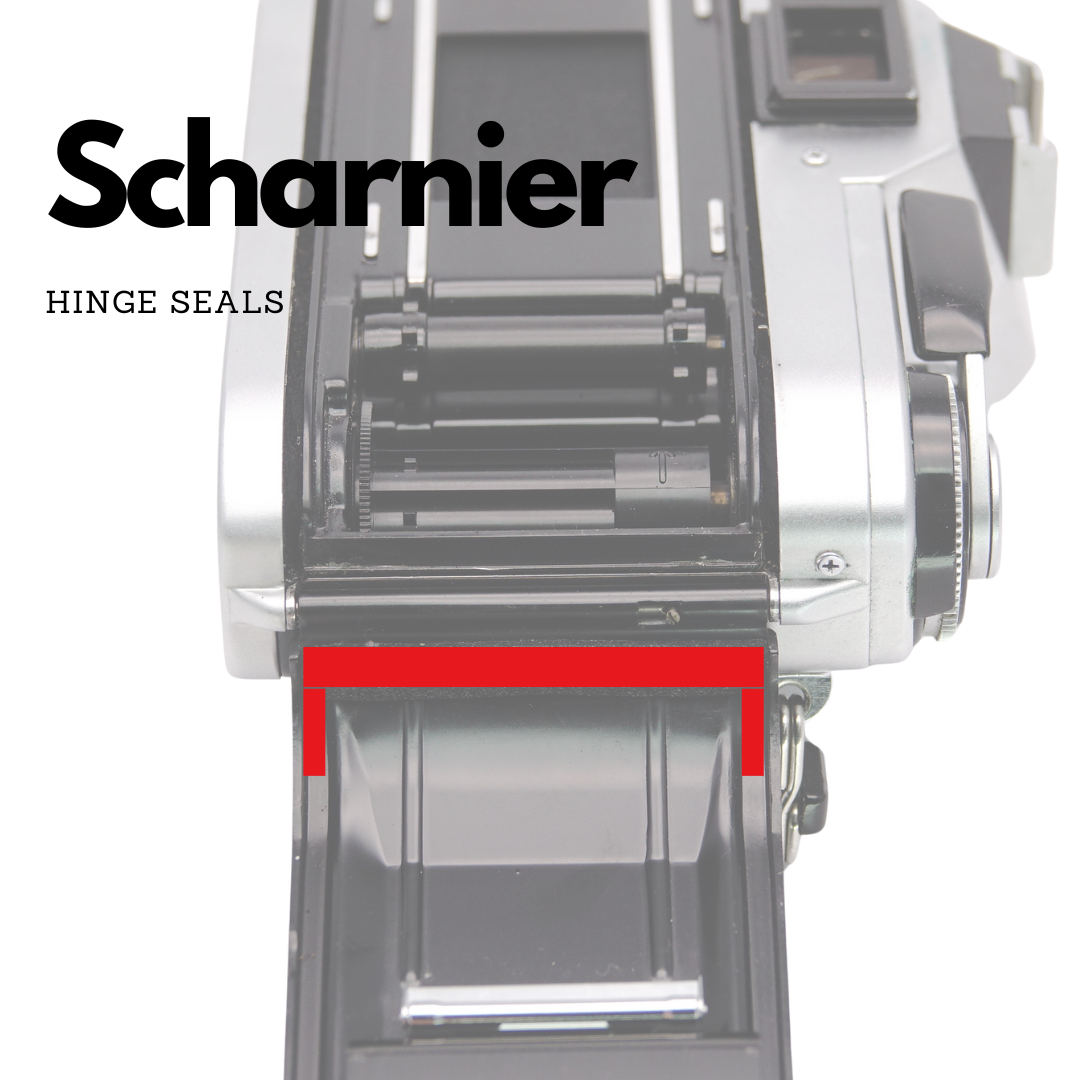
- Remove the rear panel: On most 35mm SLRs (Canon AE-1, Olympus OM-1, Pentax ME), you can remove the rear panel without tools by pulling out the hinge pin. Working on a detached door is much easier.
- Protect the shutter: Before starting, cover the shutter curtain with the included shutter curtain protector. The curtain is extremely delicate; never touch it with tools or your fingers.
- Peeling off the protective film: The included tweezers also serve as the peeling aid. They make it easy to grip and peel off the protective film of the narrow strips.
- Avoid the film-counter opening: There is a small opening for resetting the film counter on the rear panel, usually in the upper right. No isopropanol or sealing material must get inside it.
- Focusing screen: No alcohol. Isopropanol permanently damages the focusing screen. When replacing the mirror bumper, place a trimmed Post-it over the mirror and focusing screen to catch crumbs.
- Final cleaning: Clean the outside of the body with a slightly damp microfiber cloth and a drop of dish soap. Do not let water get into the body seams.
Frequently asked questions
“Why use universal strips instead of pre-cut seals?”
Contour-cut seals sound precise, but they have disadvantages in practice: The narrow strips for the rear-panel edge can easily tear at the cut edges, and one mistake uses up the entire kit. Universal strips are more robust, can be flexibly fitted around every curve of the rear panel, and are enough for 1–2 or 2–3 cameras depending on the variant. You can fit the straight strips into the narrow groove just as well.
“I’m not a DIY person—can I do this myself?”
Yes. Replacing the seals requires patience, but no special skill. In our workshop, we have resealed hundreds of cameras and documented the method so that beginners can complete it on a quiet afternoon. Our step-by-step guide with photos and the accompanying video show every step.
“The self-adhesive strips stick to the tweezers instead of staying in the groove.”
This is the most common source of frustration. Two solutions: First, only remove the protective film 2–3 cm at a time, rather than all at once. Second, use the soapy-water trick: Remove the protective film and briefly dip the strip in water with a drop of liquid soap. The adhesive will not grab for one or two minutes, so you can position the strip without stress. Once the water has dried, it will hold as usual. We tested the trick with soapy water and with isopropanol; soapy water works better.
“I can’t get the strip into the really narrow grooves.”
In narrow, deep grooves such as those on the Canon F-1, the adhesive often grabs the sidewalls before the strip reaches the bottom, and the strip tears when you try to push it farther in. A customer with exactly this camera gave us the idea: briefly dip the strip in soapy water (see above), calmly push it to the bottom of the groove, and let it dry. An alternative without adhesive: Leave the protective film completely in place and press the strip into the groove without adhesive. The friction in the narrow groove holds the foam securely in place. Several customers and we have used this method for years without any problems.
“Do I really need a new mirror bumper? Mine still looks fine.”
If the bumper is even slightly crumbly: yes. Without a functional bumper, the mirror hits the upper stop hard every time you take a picture. This causes noticeable vibrations during long exposures and accelerates wear on the mirror mechanism. The foam crumbs also land directly on the focusing screen and mirror.
In our video, we demonstrate the complete replacement step by step on a Pentax ME Super. The method works identically with Canon AE-1, Olympus OM-1, Minolta SRT, and all other 35mm SLRs.
Watch the video: How to change light seals on a 35mm SLR (German subtitles)
You can find the detailed step-by-step guide with photos in our blog article: How to replace the light seals in your analogue camera
Share

Lichtdichtung passt hervorragend und macht was es soll.
Die Verarbeitung des Dichtsatzes ist sehr gut, nur waren die meisten Breiten für mich nicht nutzbar. Aber ich habe meine Olympus 35 RC damit wieder "dicht" bekommen. Die Pinzette ist zum Abschaben der alten Dichtungen und zum Andrücken der Neuen gut. Für die Funktion als Pinzette ist sie aber zu dick. Werde den Dichtsatz auch für die nächste Kamera wieder kaufen.


Nach Lichtdichtungen van 2 anderen hersteller endlich etwas das gutt funktioniert.
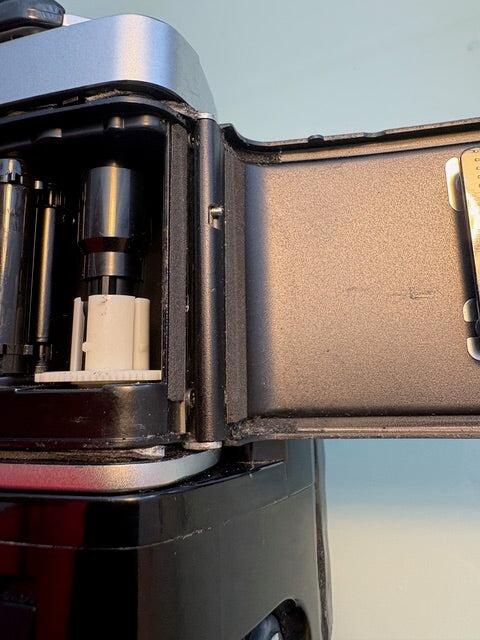
Leider sind die Vorlagen schlecht ausgeschnitten gewesen und beim versuch sie zu trennen gerissen. Qualität war sonst ganz gut.
Hallo Carlo, wenn die Streifen beim Heraustrennen reißen, ist der Zuschnitt zu tief gegangen. Das ist unser Fehler, kein Handhabungsfehler. Schreib uns kurz an info@ausgeknipst.de, du bekommst ein neues Set. Unseren Filmschneider haben wir inzwischen überarbeitet, der Schnitt stimmt wieder.
Vladi · Ausgeknipst
Alles was man braucht um durchzuziehen. Ohne das Kit wäre ich vermutlich erst später auf das Thema aufmerksam geworden. Besonders den Spiegeldämpfer hatte ich nicht auf dem Radar.
Reviews in Other Languages
Very nicely packaged, came with a a small present, and a pretty useful tool. Quality product. Watched even the installation video. BUT one important detail should be added to the instructions. The 1-2mm wide strips should be dipped in soapy water first so they could be positioned properly before the adhesive sticks to the camera. Otherwise the installation could turn into a very unpleasant experience. :)
Hyvä sisältö ja paketti
Really nice kit, just the pincer is really a toy, I used something else instead.
But geeeeee, it is tricky to change the seal in front of the mirror 🥲

We are Anto & Vladi
Support a young startup
You want innovative solutions instead of mass-produced goods? With us, you don’t buy from an anonymous wholesaler, but directly from the founders. We (Anto & Vladi) started our startup in 2021 in Würzburg to help you revive analog photography.

Developed by engineers
Quality made in Germany
We don’t sell anything we wouldn’t use ourselves. We are engineers and camera nerds, and we know that precision is especially important in camera technology. That’s why every single part is designed and thoroughly tested by us here in Würzburg.

From Germany to the whole world
Fast DHL shipping
You don’t want to wait forever for your item? Every product is personally made fresh for you in Würzburg on the day of your order, checked, packed, and shipped worldwide. As soon as you place your order, your package is almost on its way to you with the fastest shipping options from DHL and Deutsche Post.